
Curved walkway field guide
Plan the middle. Count both edges.
The outside of a curve is longer than the inside. That means a curved walk may need more flexible forms on one side than the other. Here is the simple math and the field check.

This is the actual flexible-form product. The achievable curve still depends on height, setup, and the exact job.
The curve math
The outside edge is longer than the inside edge, so count them separately. The radius is the distance from the center point of the curve to the line you are measuring. Use the formula below for each edge.
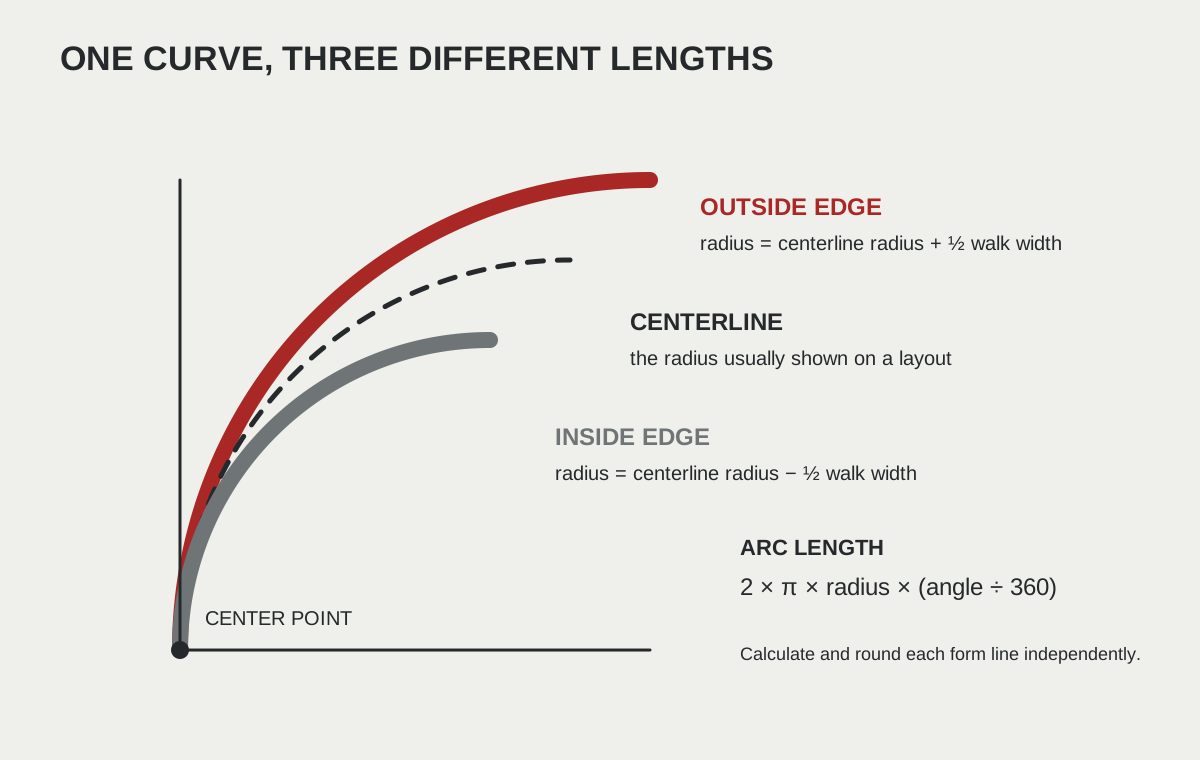
outside radius = middle radius + half the walk width
curve length = 2 × π × radius × (degrees ÷ 360)
Example: a 4-foot-wide walk makes a 90-degree turn around a 20-foot radius measured to the middle. The inside edge is about 28.3 feet long. The outside edge is about 34.6 feet long. That starts with three 10-foot flex forms inside and four outside.
Curve calculator
This is planning math, not a promise that the form will make the bend. Call us before ordering a tight curve.
1. Know what kind of curve is on the plan
One smooth radius
A simple radius has one center point. Measure the same distance from that center point to mark the curve. First check whether the plan measures the radius to the inside edge, the middle of the walk, or the outside edge.
S-curve or freehand path
An S-curve may not have one center point. Mark the middle of the walk first. At several spots, measure straight out from the middle to both edges. Do not set two curves by eye and hope the width stays right. Use more marks where the curve changes quickly.
2. Keep the walk the same width
Measure straight across the walk, not on a slant. A slanted tape reads too long and can make the walk wider through the bend.
- Mark the middle of the walk.
- Mark the start and end of each curve.
- Measure half the walk width to each side.
- Connect the marks with a smooth curve.
- Stand back and sight the forms from both ends.
- Check the width and top-of-form grade again before tightening everything.
On an S-curve, the inside of the first bend becomes the outside of the next bend. Split the takeoff where the bend changes direction.
3. Turn both curve lengths into form pieces
Our flexible forms are 10 feet long and come in 4-, 6-, 8-, 10-, and 12-inch heights. Use the height shown on the job plan. Then divide each edge length by 10 and round up.
On smaller screens, scroll horizontally to review every column.
| You need | Why | Where to find it |
|---|---|---|
| Radius | Tells you how tight and how long the curve is | Job plan or field layout |
| Degrees of turn | 90° is one-quarter circle; 180° is one-half | Plan or layout |
| Walk width | Finds the inside and outside radiuses | Job plan |
| Form height | Must match the concrete edge | Job plan and local requirements |
| Start and end connections | Shows where straight and flex forms meet | Marked field sketch |
The calculator gives a starting piece count. It does not promise that the form will make a tight bend or that every joint will land in a good spot.
4. Check the curve before ordering concrete
Make the straight run flow into the curve
A sharp hook where the straight form meets the flex form will show in the finished walk. Keep the straight line true until the curve starts. Then ease into the bend.
Keep a joint away from the sharpest part when you can
A joint at the hardest part of the bend is tougher to line up. If the layout allows it, move the joint to an easier part of the curve.
Pin and check as you go
Work along the curve a little at a time. The number of pins depends on the form height, ground, curve, connections, and way concrete will be placed. There is no one spacing that works on every job. Add support anywhere the form can move.
Walk it before the truck comes
- Sight both curves from both ends.
- Check the walk width through the whole bend.
- Make sure each joint is tight, flush, and free of kinks.
- Check the top of the forms for line and grade.
- Call us with the radius and form height if the bend is tight.
- Keep pins and hardware out of the screed path.
Then use the steel form pre-pour checklist for the final walk-through.
Questions contractors ask
Why are the two form lines on a curved walk different lengths?
The outside edge follows a larger radius than the inside edge. Over the same angle, the larger-radius arc is longer, so the two edges can require different numbers of 10-foot flexible sections.
Can I use the centerline length for both sides?
No. The centerline is useful for layout, but it is neither edge. For a constant-width circular arc, subtract half the walk width to find the inside radius and add half the width to find the outside radius, then calculate each arc separately.
What is the tightest radius for Ohio Metal Forms flexible forms?
There is not one safe answer for every setup. The form height, connections, ground, pins, and way the curve is set all matter. Send us the radius and form height before ordering a tight curve.
Sources and scope
We used the following sources for general formwork and flatwork principles. Product dimensions and fit statements on this page refer specifically to the current Ohio Metal Forms catalog.
- FHWA, Construction of Portland Cement Concrete Pavements — Participant's Manual — general guidance on fixed forms, flush adjoining ends, and using flexible sections for tighter curves
- Metal Forms Corporation, Poly Meta Forms Field Manual — manufacturer field context for staking a curve progressively and avoiding a section joint at the apex
- Ohio Concrete, Industry Recommendation for Exterior Concrete Flatwork — Ohio-specific reminder to follow local thickness requirements and minimize corrective work through proper preparation
This guide is planning information, not a project design, engineering judgment, safety plan, code interpretation, or substitute for the contract documents. The contractor remains responsible for means, methods, site conditions, competent-person review, and applicable requirements.