
Steel form pre-pour checklist
Find the movement before the concrete does.
Walk the forms before the truck gets there. Check the height, base, line, grade, joints, pins, inside face, and screed path. A five-minute catch can save a bad edge and a long day.

The photo shows steel-form fabrication in Sandusky. Inspect the finished forms before setup, then walk the completed line against the latest job plan and grade marks.
Check these before the truck comes
Use the latest plan. Check the form height, measurements, base, line, grade, joints, corners, pins, connections, inside face, and screed path. Fix every problem and check it again. Keep watching the forms while the concrete is placed.
Do not just mark “forms done.” Write what was checked and who checked it. If the job has a required tolerance or inspection hold point, use the number and approval shown in the job documents.
1. Use the latest plan
Write down the job, pour area, date, plan revision, and the name of the person checking it. Walk the exact area that will be poured. If the print and a field change do not agree, stop and find out which one is right.
On smaller screens, scroll horizontally to review every column.
| Check | What good looks like | Stop when |
|---|---|---|
| Form height | Matches the concrete edge shown on the plan | The form height and plan do not match |
| Length and width | Measurements match the layout | The two sides drift or the field size is different |
| Square pad | Diagonals are checked | The sides are right but the pad is out of square |
| Curved work | Width and both edges match the layout | Both edges were set by eye |
| Other trades | Required openings and embedded parts are checked | Somebody is treating this form check as approval of everything |
2. Check the form and the ground under it
Clean off the form so you can see it. Check the top edge, base, pockets, wedges, ends, welds, and connections. Pull out any form with a bad bend, crack, broken weld, heavy rust, packed concrete, or a damaged end that will not join flush.
Make sure the base does not rock
The whole base should sit on firm, prepared ground. A form can look straight while it is empty and then move when the pins are tightened, the screed rides on it, or concrete pushes against it. Push on the form at the ends and between pockets. Fix the low spot instead of trying to hide the movement with one more pin.
- No loose stone trapped under the base.
- No washout, rut, frost, or soft spot under the form.
- No twisted section forced into line.
- No dried concrete keeping a joint from closing.
3. Check line, grade, width, and every joint
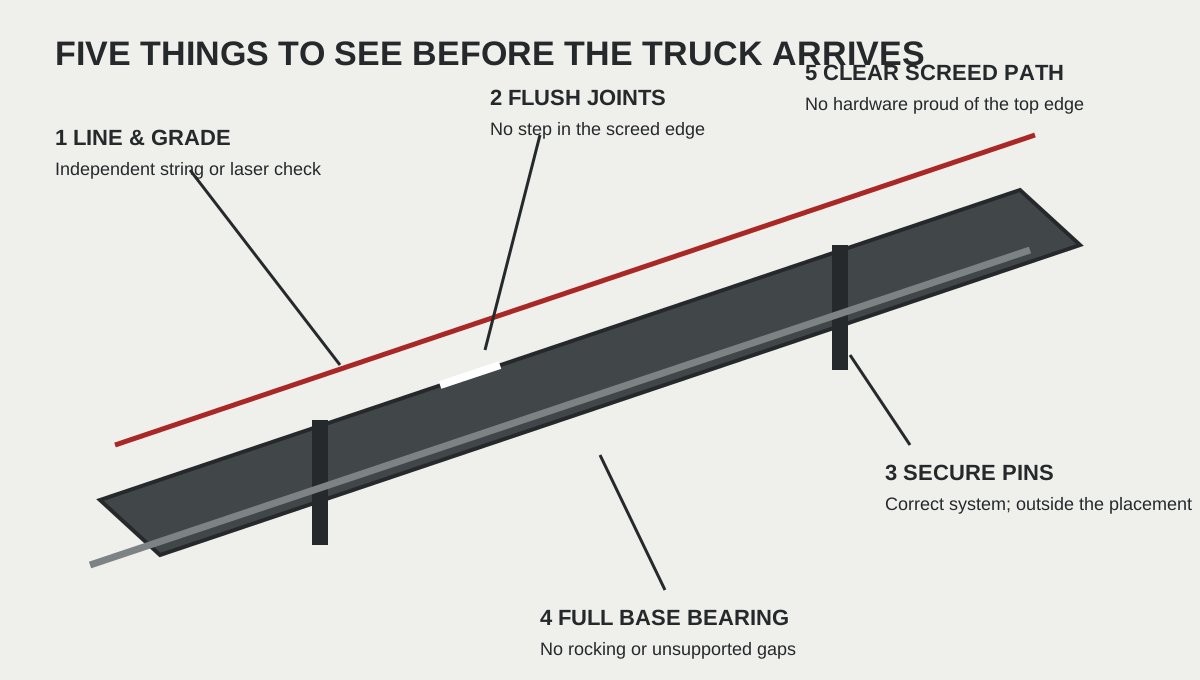
A bubble level checks a short section. It does not tell you whether the whole form is at the right job elevation. Use the laser, stringline, level marks, or survey points called for on the job. Keep the string clear of the form so the form cannot push it and fake a good reading.
Look down the top edge
Sight the form from both ends. Run a straightedge across every joint. The ends should be tight and flush. If one end sits high, the screed can bump over it and leave a bad edge. Check the line again after tightening a joint.
Check the other side too
On a walk, measure the width in several places and check the slope shown on the plan. On a pad, check the sides, corners, and diagonals. On a curve, check the width and sight where the straight run flows into the bend.
4. Check the pins, inside face, and work area
Use pins and parts that fit
Check every pin, pocket, wedge, connector, corner, and filler. Parts from another brand may look close and still fit wrong. The form height, ground, curve, equipment, and way the concrete is placed all change how much support is needed.
OSHA requires formwork to hold the loads that can reasonably hit it. That is why this guide does not give one pin spacing for every job. If a form can move, add support and get the setup checked.
Clean the concrete side
Remove loose concrete and dirt without damaging the form. Use a release product made for the form and the finish you need. Follow the label. Do not soak the form; puddles can cause surface problems.
Clear the screed path
Walk the route the crew and finishing tools will use. Keep pins and hardware out of the screed path. Make sure the truck or pump can reach the pour and choose who will watch the forms for movement.
5. Fix it and check it again
- Mark a bad or unsure item “NO.”
- Write down exactly where the problem is.
- Give the fix to a named person or crew.
- Check the repair with the same string, laser, tape, or straightedge.
- Write down who gave the pour the go-ahead.
- Recheck after weather, equipment contact, or any other disturbance.
After the pour, use the steel form care and storage guide to clean and check the forms before the next job.
Questions contractors ask
When should the form line be checked?
Complete a documented review before concrete is ordered or released, after any correction or disturbance, and continue watching the formwork during placement. Project requirements may add hold points or responsible-party sign-offs.
How far apart should steel form pins be?
There is no one spacing for every job. Form height, soft or hard ground, straight or curved work, connections, equipment, and the way concrete is placed all matter. Use the right pins for the system and add support anywhere the form can move.
Can diesel fuel be used as a steel form release agent?
Do not improvise a release product. ACI notes that barrier agents such as diesel can stain concrete, cause surface problems, interfere with later coatings, and are not recommended for architectural concrete. Use a release product intended for the form material and finish, and follow its label and project requirements.
Sources and scope
We used the following sources for general formwork and flatwork principles. Product dimensions and fit statements on this page refer specifically to the current Ohio Metal Forms catalog.
- OSHA 29 CFR 1926.703, Requirements for cast-in-place concrete — the controlling general requirement that formwork be designed, supported, braced, and maintained for reasonably anticipated loads
- American Concrete Institute, Form release agents — selection context, surface risks of barrier agents, and reference to ACI 347R
- FHWA, Construction of Portland Cement Concrete Pavements — Participant's Manual — fixed-form field principles including depth, tight connections, support, and flush adjoining ends
This guide is planning information, not a project design, engineering judgment, safety plan, code interpretation, or substitute for the contract documents. The contractor remains responsible for means, methods, site conditions, competent-person review, and applicable requirements.